Gluten-Free Chicken Pot Pie With a Flaky, Golden Crust (The Comfort Food That Started a Fight)
This post may contain affiliate links. Please read our disclosure policy.
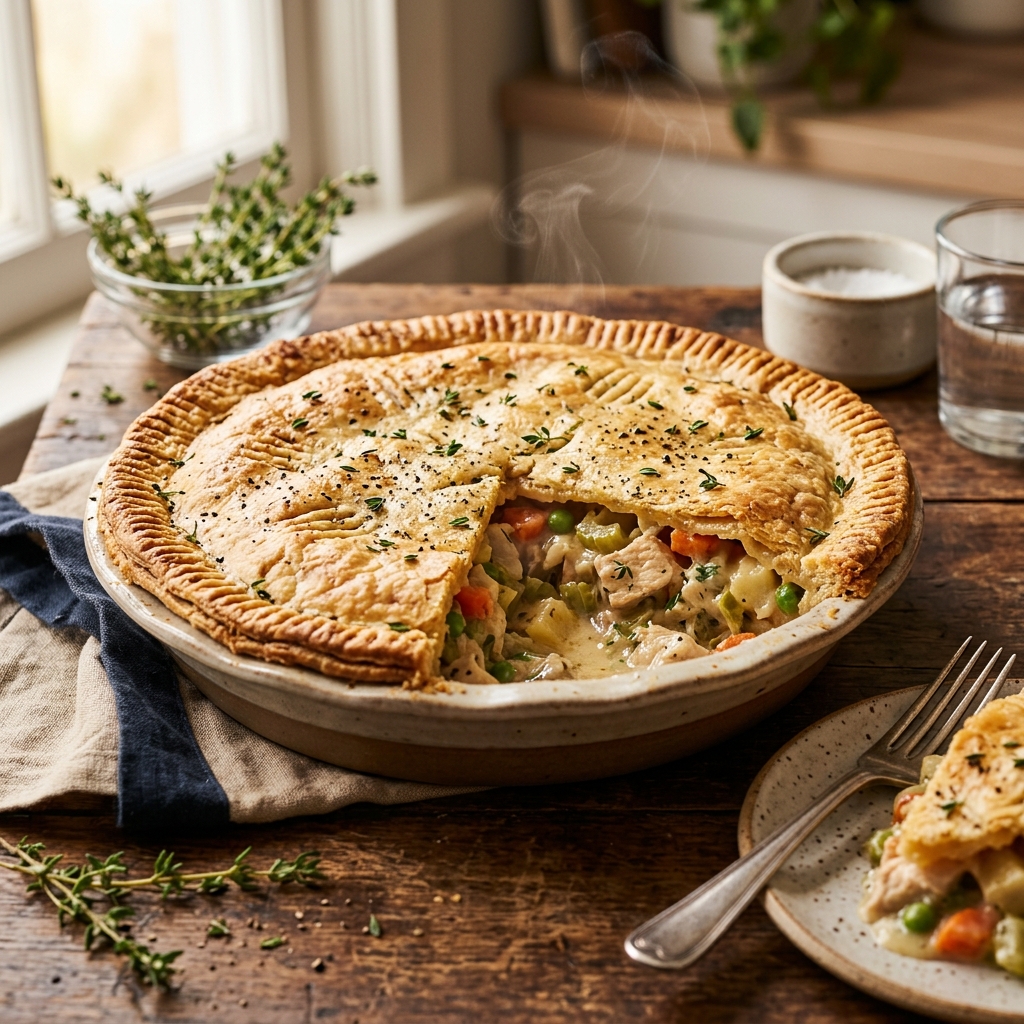
This gluten-free chicken pot pie has a flaky, buttery, golden crust that shatters when you cut into it, revealing a thick, creamy chicken and vegetable filling. My neighbor ate three slices and when I told her it was gluten-free, she accused me of lying. I consider that the ultimate review.
Want to save this recipe?
Enter your email and we'll send it to you! Plus, get new recipes every week.
The Comfort Food I Thought I Lost
After my celiac diagnosis, I quietly accepted that certain foods were gone forever. Not "until someone makes a GF version" gone — GONE gone.
Chicken pot pie was at the top of that list.
Because pot pie isn't just a recipe — it's a CRUST. A flaky, buttery, golden crust that shatters when you cut into it and reveals a thick, impossibly creamy chicken filling underneath. That crust IS the dish.
And GF crusts? They're either cracker-like (snap, no flake), tough and chewy (like edible cardboard), or so fragile they collapse the second you try to move them.
I spent two months and about $80 in GF flour testing crusts. The breakthrough came when I added tapioca starch — it creates layers that actually separate and flake, mimicking what gluten does in wheat dough.
The night I served this to my neighbor, she ate three slices. When I told her it was gluten-free, she said — and I quote — "You're either lying or I've been wasting my time eating regular pot pie." I consider that the ultimate review.
Why This Recipe Works
Ingredients Explained
The Crust
The Filling
🔍 Still reading labels the hard way?
Check Gluten scans any food label in 3 seconds and tells you exactly what's safe. Trusted by celiacs worldwide.
How to Make GF Chicken Pot Pie (Step by Step)
Step 1: Make the Crust (30 Minutes Before)
In a large bowl, whisk together GF flour, tapioca starch, salt, and sugar. Add cold butter cubes. Using a pastry cutter or your fingers, work the butter into the flour until the mixture looks like coarse sand with pea-sized butter pieces.
Critical: Don't overwork it. You WANT visible butter pieces. They create flaky layers.
Mix together egg yolk, 3 tablespoons ice water, and vinegar. Pour over the flour mixture and stir with a fork until the dough just comes together. If it's too dry, add ice water 1 tablespoon at a time.
Shape into a disc, wrap in plastic, and refrigerate for at least 30 minutes. Make the filling while the dough chills.
Step 2: Cook the Vegetables
Melt 4 tablespoons of butter in a large oven-safe skillet or Dutch oven over medium heat. Add diced onion, celery, and carrots. Cook 5-6 minutes, stirring occasionally, until the vegetables are softened but still have a little bite. Add minced garlic, cook 1 minute until fragrant.
Step 3: Make the Gravy
Sprinkle 1/3 cup GF flour over the vegetables. Stir for 1-2 minutes — this cooks the raw flour taste out.
Slowly pour in GF chicken broth, about 1/2 cup at a time, stirring constantly. The mixture will seize up at first, then loosen as you add more liquid. Add the milk or cream. Continue stirring until the gravy thickens — about 3-4 minutes. It should coat the back of a spoon.
Step 4: Build the Filling
Stir in the shredded chicken, frozen peas (straight from frozen — they'll heat through in the oven), thyme, onion powder, salt, and pepper. Taste and adjust seasoning — the gravy should be well-seasoned because the crust is plain.
Pour filling into a deep-dish pie plate or leave it in the skillet if oven-safe.
Step 5: Roll and Top
Take the chilled dough from the fridge. Place it between two sheets of parchment paper and roll to a circle about 1 inch wider than your dish.
Peel off the top parchment. Using the bottom parchment as a sling, flip the dough over the filling. Peel off the parchment, trim the edges, and crimp around the rim with a fork.
Cut 3-4 slits in the top to let steam escape (otherwise the crust gets soggy from trapped steam).
Step 6: Egg Wash & Bake
Brush the entire crust with egg wash (1 egg + 1 tablespoon water). This gives you that gorgeous, restaurant-quality golden shine.
Place the pot pie on a baking sheet (to catch drips) and bake at 400°F for 35-40 minutes until:
Step 7: Rest
Let it rest for 10 minutes. The filling will be volcanic hot and needs time to thicken slightly so it doesn't run everywhere when you serve.
Variations
Turkey Pot Pie
Substitute turkey for chicken. Perfect for Thanksgiving leftovers.
Vegetable Pot Pie
Skip the chicken. Add mushrooms, potatoes, and extra peas and carrots. Use vegetable broth instead of chicken broth.
Individual Pot Pies
Divide filling into ramekins. Cut small circles of dough for each. Bake 25-30 minutes. Perfect for portion control and impressive presentation.
Biscuit-Topped Pot Pie
If you don't want to roll dough, drop spoonfuls of GF biscuit dough on top instead of a sheet crust. Rustic and easy.
Expert Tips
The Cold-Everything Rule
Cold butter, ice water, cold hands. If the butter melts into the flour, the crust will be tough, not flaky. Work quickly and refrigerate the dough if it gets warm.
Don't Skip the Rest
The 10-minute rest after baking is critical. The filling sets and thickens. Serve it immediately and it runs everywhere. Patience = perfect slices.
Freeze for Later
Assemble the entire pot pie (unbaked), wrap tightly in foil, and freeze for up to 3 months. Bake from frozen at 375°F for 50-60 minutes (add 15-20 minutes to account for frozen filling).
📩 Want more tips like this?
Join celiacs getting weekly gluten-free tips, recipes, and hidden gluten alerts.
No spam. Unsubscribe anytime.
Ingredient Swaps
How to Store
Frequently Asked Questions
Why is my crust crumbly and won't roll?
Not enough liquid. Add ice water 1 tablespoon at a time until the dough holds together when squeezed. Also, let the dough warm up for 5 minutes if it's been chilling a long time — too cold = cracks.
Can I use a pre-made GF pie crust?
Yes! Wholly Wholesome GF pie shells are decent. Thaw in the fridge, roll slightly larger, and drape over the filling. Homemade is flakier, though.
My filling is too watery. Help!
Next time, add just 1 cup broth first and see if the gravy is thick enough before adding more. Also make sure you cook the roux (butter + flour) for a full 2 minutes before adding liquid — this activates the thickening power.
Can I make a double-crust pot pie?
You can, but a bottom GF crust tends to get soggy. If you want a bottom crust, blind-bake it first (line with parchment, fill with pie weights, bake 15 minutes at 375°F, then fill and add the top crust).
Scan your chicken broth, flour, and frozen vegetables with Check Gluten — broth is one of the most common hidden sources of gluten.
Gluten-Free Chicken Pot Pie With a Flaky, Golden Crust (The Comfort Food That Started a Fight)
This gluten-free chicken pot pie has a flaky, buttery, golden crust that shatters when you cut into it, revealing a thick, creamy chicken and vegetable filling. My neighbor ate three slices and when I told her it was gluten-free, she accused me of lying. I consider that the ultimate review.
Ingredients
- --- For the flaky GF pie crust (top only) ---
- 1 1/2 cups (210g) gluten-free 1-to-1 baking flour
- 1/4 cup (35g) tapioca starch
- 1/2 teaspoon salt
- 1/2 teaspoon sugar
- 10 tablespoons (140g) cold unsalted butter, cubed
- 1 large egg yolk
- 3-5 tablespoons ice water
- 1 teaspoon apple cider vinegar
- --- For the filling ---
- 3 cups cooked chicken, shredded (rotisserie works perfectly)
- 4 tablespoons unsalted butter
- 1 medium onion, diced
- 3 stalks celery, diced
- 3 medium carrots, diced
- 3 cloves garlic, minced
- 1/3 cup (45g) gluten-free 1-to-1 flour
- 1 1/2 cups chicken broth (verified GF)
- 1 cup whole milk or heavy cream
- 1 cup frozen peas
- 2 teaspoons fresh thyme (or 1 teaspoon dried)
- 1/2 teaspoon onion powder
- Salt and pepper to taste
- --- For the egg wash ---
- 1 egg beaten with 1 tablespoon water
Instructions
Make the crust: Whisk GF flour, tapioca starch, salt, and sugar in a large bowl. Add cold butter cubes and cut in with a pastry cutter or your fingers until the mixture resembles coarse crumbs with pea-sized butter pieces. Mix egg yolk, 3 tablespoons ice water, and vinegar. Pour over flour mixture and stir until dough comes together, adding more ice water 1 tablespoon at a time if needed. Form into a disc, wrap in plastic, and refrigerate for 30 minutes.
Make the filling: Melt butter in a large oven-safe skillet or Dutch oven over medium heat. Add onion, celery, and carrots. Cook 5-6 minutes until softened. Add garlic and cook 1 minute.
Sprinkle GF flour over the vegetables and stir for 1-2 minutes to cook the flour. Slowly pour in chicken broth, stirring constantly. Add milk/cream and stir until the sauce thickens, about 3-4 minutes.
Stir in shredded chicken, frozen peas, thyme, onion powder, salt, and pepper. Transfer to a 9-inch deep-dish pie plate or leave in the oven-safe skillet.
Preheat oven to 400°F. Roll the chilled dough between two sheets of parchment paper to a circle slightly larger than your dish. Carefully lay the dough over the filling. Trim edges and crimp with a fork. Cut 3-4 slits in the top for steam vents.
Brush the entire top with egg wash. Place the pot pie on a baking sheet to catch drips.
Bake at 400°F for 35-40 minutes until the crust is deeply golden and the filling is bubbling through the slits. Let rest for 10 minutes before serving.
Nutrition Information
Calories: 440 per serving | Carbs: 32g | Protein: 24g | Fat: 24g
Nutrition information is an estimate provided by an online calculator.
Find Gluten-Free Recipes on Amazon
Shop certified gluten-free options
Top Gluten-Free Picks
📢 Found this helpful? Share it!
Stop Guessing. Start Scanning.
Every ingredient label has hidden gluten risks. Check Gluten's AI catches them all — in 3 seconds flat.
Camera + text input
Priority support
No credit card required • Cancel anytime
The Ultimate Celiac Survival Bundle
Stop stressing over cross-contamination and what to make for dinner. Get our complete 500+ recipe cookbook, dining out guide, and label reading cheat sheets.
200+ GF Baking Recipes
& Fast Food Protocols
Instant PDF Download • 60-Day Money Back Guarantee
About the Author
Rachel Lopez
Recipe Developer & Certified Pastry Chef
Rachel is a classically trained pastry chef who transitioned to gluten-free baking after her daughter was diagnosed with celiac disease. She develops and tests every recipe on Check Gluten, ensuring they work perfectly with GF ingredients.
Meet our full team →Medical Disclaimer: This article is for informational purposes only and is not a substitute for professional medical advice. Always consult your physician or a registered dietitian before making dietary changes related to celiac disease or gluten sensitivity. Read full disclaimer.
Related Articles
Easy Gluten-Free Meatballs (Better Than Store-Bought)
Tender, juicy, authentic Italian meatballs made entirely gluten-free. No special GF breadcrumbs required—we use a secret pantry ingredient to keep them perfectly soft!
Ooey Gooey Gluten-Free Cinnamon Rolls
You CAN have pillowy, melt-in-your-mouth cinnamon rolls on a gluten-free diet. This yeast-based recipe creates the magnificent, gooey breakfast treat of your dreams.
Fluffy & Buttery Gluten-Free Biscuits
Mile-high, flaky, buttery gluten-free biscuits that don't crumble when you butter them. Only 6 ingredients and ready in 30 minutes!
Easy Gluten-Free Sourdough Bread For Beginners
Missing real, crusty, tangy sourdough bread? This step-by-step guide walks you through making a gluten-free sourdough starter and baking your first perfect loaf.