The Best Gluten-Free Pie Crust: Flaky, Buttery & Actually Holds Together
This post may contain affiliate links. Please read our disclosure policy.
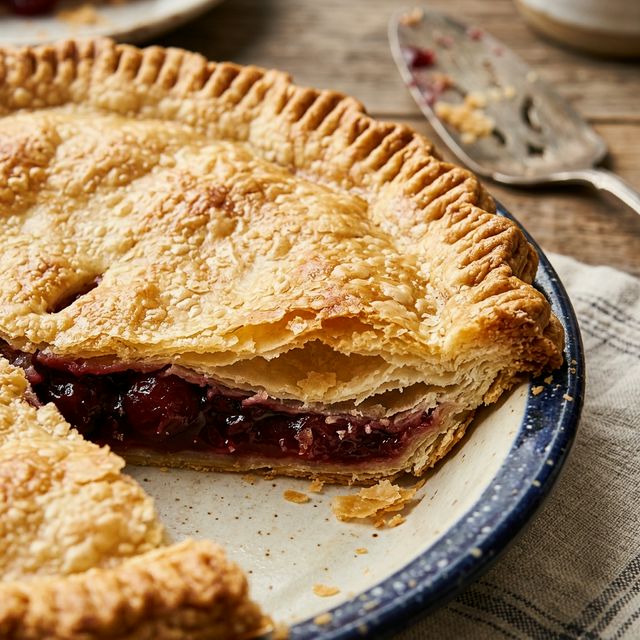
Every GF pie crust I tried before this one either crumbled, tasted like cardboard, or required a PhD in pastry science. This one is buttery, flaky, rolls out like real dough, and holds together when you cut a slice. It's the pie crust that made me cry at Thanksgiving.
Want to save this recipe?
Enter your email and we'll send it to you! Plus, get new recipes every week.
The Thanksgiving I Cried Over Pie
Three years post-diagnosis. My first real attempt at Thanksgiving dessert.
I'd made the turkey (safe). The GF gravy (nailed it). The sides (easy — most are naturally GF).
But the pie. The PIE. Grandma's pumpkin pie recipe that's been in our family for 40 years. It requires a homemade crust.
I tried a store-bought GF crust. It was $7, tasted like dust, and crumbled the moment I tried to cut a slice. My slice looked like pie rubble on a plate.
I tried making one from scratch with a random recipe online. It was so crumbly I couldn't roll it. I pressed it into the pan with my fingers and it came out hard as a hockey puck.
I sat in the kitchen, failed crust #2 in the trash, and cried. Because it's just pie. But it's not just pie — it's Grandma's pie, at our table, and I was the only one who couldn't eat it.
That was the last Thanksgiving I cried over pie. Because I spent the next three months developing this crust. And it's perfect.
Why This Recipe Works
The Science of Flaky Pie Crust (And Why GF Is Different)
In regular pie crust, gluten forms elastic sheets that trap butter as it melts. The butter turns to steam, puffing up those sheets into flaky layers.
Without gluten, those sheets don't form naturally. The butter just melts into the flour and you get a dense, cookie-like crust.
The fix: cold butter + minimal handling + the right flour blend.
By keeping the butter ICE cold and mixing minimally, you preserve pea-sized butter chunks in the dough. When these chunks hit the oven's heat, they melt and create steam pockets — the same mechanism that makes wheat pie crust flaky. The GF flour acts as the shell around those pockets.
Ingredients Explained
How to Make GF Pie Crust (Step by Step)
Step 1: Freeze the Butter
Cut 2 sticks of butter into 1/2-inch cubes and put them in the freezer for 15 minutes while you prep everything else. This is the single most important prep step.
Step 2: Mix Flour + Cut In Butter
Whisk flour, sugar, and salt. Add the frozen butter cubes and work them in with a pastry cutter or your fingertips until the mixture looks like coarse sand with pea-sized butter pieces.
Work FAST. The more you handle the dough, the more the butter melts from your body heat. Speed = flakiness.
Step 3: Add the Liquids
Whisk the egg with apple cider vinegar and drizzle over the flour. Toss with a fork.
Add ice water ONE TABLESPOON at a time. After each addition, squeeze a handful of dough. When it holds together without crumbling, STOP. You'll typically need 4-5 tablespoons.
Pro Tip: Less water = flakier crust. More water = easier to roll but tougher. Find the sweet spot where it just barely holds together.
Step 4: Chill (NOT Optional)
Shape the dough into two flat disks, wrap tightly in plastic, and refrigerate for at least 1 hour. This firms the butter back up, hydrates the flour, and makes the dough much easier to roll.
You can make the dough up to 2 days ahead. Just pull it out 10 minutes before rolling.
Step 5: The Parchment Paper Rolling Technique
This is the game-changer for GF pie crust:
Why parchment works: GF dough sticks to everything. The parchment prevents sticking WITHOUT adding extra flour, which would make the crust tough.
Step 6: Transfer to Pie Dish
Peel off the top parchment. Flip the dough into your pie dish using the bottom parchment as support. Peel off the parchment, press gently into the dish, and trim the edges to 1 inch overhang. Tuck the overhang under and crimp.
Blind Baking (For Cream Pies & Pumpkin Pie)
Some pies require a pre-baked crust. Here's how:
📩 Want more tips like this?
Join celiacs getting weekly gluten-free tips, recipes, and hidden gluten alerts.
No spam. Unsubscribe anytime.
Expert Tips
The Window Test
When cutting in butter, stop when you can still see distinct pea-sized pieces. If you can't see any butter pieces, you've over-mixed. Those visible chunks are what creates flaky layers.
Patch Cracks
GF dough cracks more easily than wheat dough. If it cracks while transferring, just press the edges back together with wet fingers. Nobody will know.
Egg Wash = Beautiful Crust
Before baking, brush the top crust with an egg wash (1 egg + 1 tablespoon water, whisked). This gives you that gorgeous golden, shiny finish.
Protect the Edges
GF crust edges brown faster than wheat. Cover the edges with aluminum foil or a pie crust shield for the first 20 minutes of baking, then remove for the last 10-15 minutes to brown.
What to Make With This Crust
Ingredient Swaps
How to Store
Frequently Asked Questions
Why is my pie crust crumbly?
Not enough liquid. Add another tablespoon of ice water next time. Also, let chilled dough sit at room temp for 10 minutes before rolling — too-cold dough cracks more.
Can I use a food processor?
Yes! Pulse the flour, sugar, salt, and frozen butter until pea-sized pieces remain. Add the egg and vinegar, then pulse. Add ice water 1 tablespoon at a time, pulsing after each. Do NOT over-process.
Why does my crust shrink during blind baking?
Two causes: (1) Dough wasn't chilled long enough — always chill at least 1 hour. (2) No pie weights — the weights hold the crust in place during baking.
Can I make this crust ahead for Thanksgiving?
Absolutely! Make the dough up to 2 days ahead and refrigerate. Or make and blind-bake the shell 1 day ahead — cover and store at room temperature. Fill and finish baking on the day.
Scan every ingredient first with Check Gluten — even butter, vanilla, and pie spice can contain hidden gluten from shared facilities.
The Best Gluten-Free Pie Crust: Flaky, Buttery & Actually Holds Together
Every GF pie crust I tried before this one either crumbled, tasted like cardboard, or required a PhD in pastry science. This one is buttery, flaky, rolls out like real dough, and holds together when you cut a slice. It's the pie crust that made me cry at Thanksgiving.
Ingredients
- 2 1/2 cups (350g) gluten-free 1-to-1 baking flour
- 1 tablespoon granulated sugar
- 1 teaspoon salt
- 1 cup (2 sticks / 226g) unsalted butter, very cold, cut into 1/2-inch cubes
- 1 large egg
- 1 tablespoon apple cider vinegar
- 4-6 tablespoons ice water
- 1 tablespoon tapioca starch (for rolling surface)
Instructions
In a large bowl, whisk together the GF flour, sugar, and salt.
Add the cold butter cubes and use a pastry cutter or your fingers to work the butter into the flour until the mixture resembles coarse meal with pea-sized butter pieces remaining. These butter pieces create the flaky layers.
In a small bowl, whisk together the egg and apple cider vinegar. Drizzle over the flour mixture.
Add ice water 1 tablespoon at a time, mixing gently with a fork after each addition, until the dough just holds together when you squeeze a handful. Don't add more water than needed.
Divide the dough in half. Shape each half into a flat disk, wrap tightly in plastic wrap, and refrigerate for at least 1 hour (up to 2 days).
When ready to use, let the dough sit at room temperature for 5-10 minutes. Roll between two sheets of parchment paper dusted with tapioca starch, rolling from center outward to about 12 inches.
Carefully peel off the top parchment, flip the dough into your pie dish, and peel off the second parchment. Press gently into the dish and trim edges.
For a blind-baked crust (cream pies, pumpkin pie): Prick the bottom with a fork, line with parchment and pie weights, bake at 375°F for 15 minutes. Remove weights and bake 8-10 more minutes until golden.
For a filled pie (fruit pies): Fill the unbaked crust, add top crust or lattice, crimp edges, cut vents, and bake according to your pie recipe.
Nutrition Information
Calories: 210 per serving (1/8 of double crust) | Carbs: 18g | Protein: 2g | Fat: 14g
Nutrition information is an estimate provided by an online calculator.
Find Gluten-Free Recipes on Amazon
Shop certified gluten-free options
Top Gluten-Free Picks
📢 Found this helpful? Share it!
The Ultimate Celiac Survival Bundle
Stop stressing over cross-contamination and what to make for dinner. Get our complete 500+ recipe cookbook, dining out guide, and label reading cheat sheets.
200+ GF Baking Recipes
& Fast Food Protocols
Instant PDF Download • 60-Day Money Back Guarantee
About the Author
Rachel Lopez
Recipe Developer & Certified Pastry Chef
Rachel is a classically trained pastry chef who transitioned to gluten-free baking after her daughter was diagnosed with celiac disease. She develops and tests every recipe on Check Gluten, ensuring they work perfectly with GF ingredients.
Meet our full team →Medical Disclaimer: This article is for informational purposes only and is not a substitute for professional medical advice. Always consult your physician or a registered dietitian before making dietary changes related to celiac disease or gluten sensitivity. Read full disclaimer.
Related Articles
Easy Gluten-Free Meatballs (Better Than Store-Bought)
Tender, juicy, authentic Italian meatballs made entirely gluten-free. No special GF breadcrumbs required—we use a secret pantry ingredient to keep them perfectly soft!
Ooey Gooey Gluten-Free Cinnamon Rolls
You CAN have pillowy, melt-in-your-mouth cinnamon rolls on a gluten-free diet. This yeast-based recipe creates the magnificent, gooey breakfast treat of your dreams.
Fluffy & Buttery Gluten-Free Biscuits
Mile-high, flaky, buttery gluten-free biscuits that don't crumble when you butter them. Only 6 ingredients and ready in 30 minutes!
Easy Gluten-Free Sourdough Bread For Beginners
Missing real, crusty, tangy sourdough bread? This step-by-step guide walks you through making a gluten-free sourdough starter and baking your first perfect loaf.